Pages

Saturday, February 11, 2012

A Valentine Love Tree to Make

Valentine's Day is right around the corner but it's not to late to unleash your creativity to make a whimsical Valentine love tree with personalized hanging hearts for your adored ones.  You can start with this idea and add your own "spin" to make the Love Tree all yours.

Create a Base for the Tree
1)      Drill a hole in either a block of wood or stacked pieces of scrap lumber.  In the example above, the branch had to be offset so that it would balance properly and not tip over. 
2)      Apply wood glue to the hole and insert the branch. 
3)      Paint the branch and base a color of your choice. 
      4)   Cut a piece of felt and glue it to the bottom of the base.

Starting to Make the Heart
1)      Cut two equal sized hearts out of felt fabric.
2)      Write a phrase on the felt with puff paint.
3)      Let dry completely.

Stitching the Heart
1)      Use a blanket stitch with 6 ply embroidery floss.
2)      Start ½ way up one side of the heart shape.

Where to Stop Stitching

1)                  A space needs to be left open so that the heart can be stuffed with polyfill fiber.
2)                  Stop stitching within at least 1 ¼” from the starting point.
Stuffing the Heart
1)         Insert stuffing a little bit at a time until the heart is nice and plump.

Closing the Heart

1)      Hold edges of heart together with fingers.
2)      Continue blanket stitch to starting point.
3)      Make a small ending stitch on the edge of the heart.
4)      Insert the needle between the felt layers and push it through the inside of the heart.
5)      Emerge at the needle’s length

Finishing the Stitching 
1)                  Pull the thread slightly taut.
2)                  Clip the thread  close to the heart
3)                  When the thread is clipped the tautness will relaase and the thread will be hidden inside the heart.


Embellishing with Glitter Glue
1)      Choose glitter glue colors to compliment the colors of the hearts.

Applying Glitter Glue 
1)                  Squeeze glue liberally around the entire edge of the heart.
2)                  Let dry completely.  
Embellishing the Heart further
1)      Apply dots of gold or silver to the front center of the heart.
2)      Let dry completely
Making the Hanging Element
1)      Measure and cut approximately 4 lengths of 1 ½ yards of ¼” ribbon.
2)      Measure up approximately 10” and make a loop.
3)      Insert crochet hook.
4)      Chain stitch 17 stitches
5)      Pull the last stitch through the ending loop and tighten
6)      Bend in half.
7)      Iron crocheted loop flat.

Mounting Hearts on Crocheted Ribbon Hangers 
1)                  Stitch or hot glue the crocheted loops to the back side of each heart.
2)                  If glued, apply finger pressure to set the loops firmly into the glue.
3)                  Be careful not to touch the glue.  It is hot.

Personalizing the Heart 
1)                  Cut a 3” wide length of white fabric.
2)                  Fold the length of fabric in half.
3)                  Stitch a ¼” seam the length of the fabric.
4)                  Turn the fabric right side out.
5)                  Free motion stitch the recipients’ names onto the fabric.
6)                  Cut apart with pinking sheers.
7)                  Lift the ribbons away from the heart.
8)                  Hand stitch the name along three sides of the tag to the back of the heart.
9)                  Leave the top open.
10)              Cut a small red, felt heart and insert it into the top of the name tag.

Some Additional Heart Examples


Examples of Completed Hearts
Hanging the Hearts
 Additional Notes

- Instead of using puff paint to write a phrase on the front of each heart, consider embroidering letters with contrasting embroidery floss.

- Instead of using glitter glue to embellish the edges, consider using decorative beads.

- Note that faux crystal fobs were hung on metallic thread in the example provided here.  That added additional movement and a shimmering quality.


Friday, February 10, 2012

Swiss Artist's Humanitarian Vision


Artist creates works to support an orphanage and the education of women and children in Africa.


I just learned that my Swiss friend, who creates jewelry and puzzles to benefit the education of women and children in Africa, will travel to an African school for orphans to contribute his invaluable support.  I knew that he would be visiting Bangui in Central Africa in March, but I did not know that he would be devoting his time and efforts to orphans.  From my safe, idyllic hillside studio in Southern California, U.S.A., my heart reaches out to my friend and those whose lives he seeks to help.

Today I offer you a few images of his original, whimsical, refrigerator magnet puzzles.  You may find a broad array of Jean's puzzles here.

See my blog post of February 8th, 2012,  where I showcased a few pictures of the Jean's beautiful jewelry and posted links to the huge array of his jewelry.  Here are a few more pieces.
   

One need only watch the evening news or read the newspaper or see headlines across the internet to realize how desperately aid for suffering women and children in Africa is needed.   It isn't often that we are able to purchase works of art to beautify ourselves and our spaces for such competitive prices and to also know with certainty that our purchase will directly benefit people who are in great need.  The next time you think about purchasing jewelry or a gift for a child, I hope that you consider Jean Nordmann's artistic creations. You may inquire about his works at:
Jean Nordmann
85 Hebelstrasse
4056 Basel
Switzerland

...or contact him via e-mail at...
nordmannjj@yahoo.fr


Tuesday, February 7, 2012

"Between Heaven and Earth" - An art quilt comes home

Alex Anderson and Ricky Tims attended the Road to California quilt show and produced a slideshow of the "Bridges" exhibit from the Quilts on the Wall group.  My quilt, "Between Heaven and Earth", was juried into the exhibit and I believe it is the 7th in the slideshow series.  After having traveled the United States with the "Bridges" exhibit for the past year, the quilt is finally coming home in March.


"Between Heaven and Earth"
Detail of Bird and Stitching
Detail of Printing with Foliage and Stitching

Artist's Jewelry to Benefit Children and Women in Africa


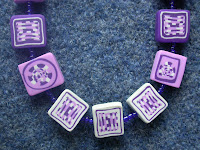
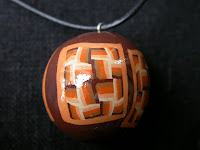
I have a friend in Switzerland who for many years worked with humanitarian agencies in numerous countries that have been devastated by the ravages of war and oppression.  His latest years were spent in the depths of the African continent and now, from Switzerland, he creates wonderful jewelry.  The proceeds from the sales of his one-of-a-kind artistic creations all go to the education of women and children in Africa.  In March, 2012, he will be traveling to Bangui in Central Africa to support such a school.

This artist creates necklaces, rings, pendants, fanciful puzzles, and other diverse creations.  I know with certainty that you will find these works a visual and tactile treat.  Another friend recently visited this artist in Switzerland and purchased one of his necklaces for me.  It is magnificent.  The colors are vibrant, the assembly is flawless, and the craftsmanship is extremely fine.  Even when I am not wearing the necklace, I love holding it and running my fingers around the absolutely smooth beads that feel like cool satin.

If you would like to order any of these magnificent pieces of jewelry art, you may reach the artist at:

Jean Nordmann
85, Hebelstrasse
4056 Basel
Switzerland


Monday, February 6, 2012

"Weather Forecast" - a 12"x12" Art Quilt

Here is my contribution, "Weather Forecast", to the January Serendipity Art Quilts exchange challenge, "Writing on the Wall".

It's winter and, sure enough, it is "written on the wall" that inclement weather will follow.  The machine appliquéd bird was originally thread painted in brown and beige shades, but because it looked dull on the quilt
background, I overpainted it with blues and then applied glitter glue on the feathers to make it shimmer, as if snow had fallen on its wings.  I stenciled the words from hand cut card stock*, free motion stitched around
each letter and then filled in the letters with glitter glue.  I quilted the piece with continuous freemotion needlework to give it an overall look of falling snowflakes.    To emphasize a snow element a faux pearl bead was stitched into the intersecting lines of each snowflake.  To achieve a binding that blended with the quilt's hand painted background, I used thinned down yellow and blue Setacolor fabric paints, scrunched the fabric
while wet, and set it in the sun to do it's "thing".

* Note about making long lasting card stock stencils:  A long time ago I learned to apply linseed oil to hand cut cardstock to make it durable, but I didn't have any linseed oil on hand.  Instead, I applied 3 coats of
polyurethane after I cut out the letters and it worked famously well.  The stencils that were used on this quilt will now stand up to repeated use without destroying the card stock.


Create an Art Quilt Coffee Table Book

I am honored to belong to Serendipity Art Quilts which is described on its blog as “A collaborative art quilt project for a group of like minded quilters who want to explore and expand their abilities in fabric and mixed media”.   Until recently themes were chosen every two months and we have been exchanging fabric art postcards.  The works coming out of this group were phenomenal.  This year we decided to expand our creative efforts to exchange 12” x 12” quilts on a quarterly basis. 

Our first themed work, “Writing on the Wall”, was exchanged in January 2012.  I received a vibrant and beautifully executed quilt titled, “The Color of Happy”, from Deborah Stanley.  I was so bowled over by it that I immediately began thinking about how I might showcase Deborah’s piece, as well as those that will arrive in the future and hit upon the idea of making a coffee table book.

Finished page with Deborah's 12" x 12" s mounted quilt

This is the process I developed for making pages for a quilt art book:

Since the exchange quilts will be 12” x 12”, cut a piece of cardboard 13” x 13”.  I used the mailer in which Deborah’s quilt arrived.
Audition the quilt atop the cut down cardboard to make sure that there will be enough marginal space around the quilt to allow for the addition of hold down tabs and to insert metal eyelets. (Deborah Stanley’s quilt shown here.)
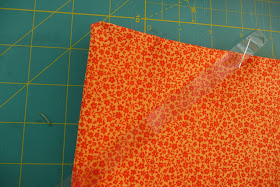
Cut two (2) 13 ½” x 13 ½” pieces of fabric.


Audition the cardboard atop the fabric to make sure there will be enough fabric for ¼” around all edges.


Place fabric right sides together and pin around all edges.

Stitch around 3 sides only.  Leave one side open for turning.

Clip Corners

Turn fabric right sides out.

Poke out all corners to crisp points.

Because the printing on the cardboard showed through the fabric, I applied a coat of gesso to the entire top surface.


Because the wetness of the gesso tends to make the cardboard warp, weight cardboard until gesso is completely dry.  (Note:  It would be best to use a plain white cardboard and then this step can be omitted.)

Insert cardboard into fabric sleeve

Prop top of sleeve open with anything on hand
Apply glue to edge of cardboard
(Note:  I used Contact Cement ™.  It adhered instantly and left no bleed through onto the fabric.  Since this edge will not come in contact  with the quilt, I doubt if there would be any damage to the quilt.)

Fold fabric onto the glued edge and finger press. 

Remove separators and apply glue to the previously glued fabric

Fold top fabric toward inside of sleeve and finger press it to the glued edge.

Measure 4” away from each corner on all edges.  Mark with a straight pin.

Cut ½” strips of vinyl for corner hold downs
Apply glue to the fabric just before each pin-marked place.
Lay vinyl strips from glued point to glued point to create the hold-down strip.
Finger press vinyl to glued fabric and let completely dry.
When glue is dry, cut off excess vinyl.

Punch holes through glued vinyl areas.


Stitch embellishment with holding bead from back to front.
Completed hold-down strap element.  Do this for all 4 corners.
Completed straps on all four corners.
Punch 3 equidistant holes and insert eyelets in the side that was glued.

Completed page with hold-down straps and eyelets.
And here, again, is the page with Deborah Stanley's quilt mounted on it.

Since the quilt can now be mounted on a stiff mounting field, it can also be displayed on a stand without drooping 
Finally, create a front and back cover
in the same way as each page is constructed.