Friday, June 15, 2012

Deconstructed Screen Printing

Toward the end of May, my talented, artist friend, Mia Bloom, paid me a visit for a few days so that we could try our hand with deconstructed screen printing in my studio.  She brought along the Kerr Grabowski  DVD that she had purchased.  If anyone is interested in learning this method of screen printing check out Deconstructed Screen Printing for Fabric and Paper.  I highly recommend it.  Not only is Kerr a great teacher but she has an endearing personality that comes across in no uncertain terms.  It's as if she is in the studio with you!


Mia and I set about making printing boards from 2" insulation board according to Kerr's directions.  The 4'x8' insulation boards from Lowe's wouldn't fit in my car so I first had to come up with some sort of transportation mode.  Here's a picture of a carrier contraption that I made out of PVC pipes, water noodles and lengths of nylon cinching straps.  I might have looked a bit funny driving down the road with neon orange water noodles strapped to the top of my car but the unit worked like a dream.
Here's my contraption that I call a Car Carry All
Much to the doubt of onlookers in Lowe's parking lot,
my Carry All worked just fine.
Because the sheet was huge Mia and I were able to get a few, big printing boards out of it that look like this:
Completed printing board
Here's an idea of the printing board's great size
We continued to revisit Kerr's video instructions on mixing thickened dye with sodium alginate, the importance of the use of soda ash, and how to mix urea water into the sodium alginate.  All this was quite foreign to me, but, by George, we were making progress.  We captured some great pictures of Mia's screens and I'm sure that you will soon be able to see them on her blog.  Images of my prepared screens are not as good as Mia's but at least they show the screens and some of the supplies we used.
Painting onto the screen with thickened dye
Because we did not have fiber reactive dyes, we used Rit Dye.
We both believe that the final colors would be much more
vibrant if we could have use fiber reactive dyes. 
One screen painted with thickened dye and another waiting
to be done.
Waiting for the screens to dry has to be the most  difficult part  of this method.  Thank goodness we had two hair dryers to hasten the process.

Here are some pictures of my final screen prints after the were thoroughly dry and after the thickened dye had been washed out of the fabric.
Final printing of 3 screened series
The picture above represents completed prints from 3 different screens.  The top row resulted from the first screen (shown above).  The middle row is from a second screen.  The bottom row resulted from a screen prepared with Elmer's School Glue and printed with thickened dye, not from the deconstructed process.

This process can easily become addictive and I'm sure there will be more projects like this coming out of my studio.  Remember, give some thought to purchasing Kerr Grabowski's DVD and be sure to check out Mia Bloom's blog in the next few days.  Her printings were absolutely  magnificent.

Sunday, April 22, 2012

How to Make a Cut-Away Stitched Grid

While vacuuming yesterday I had a brain fluff so I dropped what I was doing (so much for cleaning house) and picked up a fabric remnant.  I cut a circle out of the fabric, backed it with water soluble stabilizer, put it in a machine embroidery hoop, and set about stitching a grid.  When the circle was filled in with intersecting stitching lines, I satin stitched around the edge of the circle to assure that all the grid lines were secure.  Finally, I soaked it in warm water to remove the stabilizer and waalaa, my brain fluff worked. 


What am I going to do with it?  I don't have the foggiest idea.  It will probably sit for a long time as another "what if" thing.  I've learned so much from others who have been generous enough to share their methods and processes on-line that this is my small way of giving back.  Who knows when someone might see a "how to" that would work for something they are thinking about creating.


Saturday, April 21, 2012

Alphabet Play

While spending a bit of time out of town recently I found myself needing to pass some downtime hours.  To keep my hands busy I started fiddling around with creating an alphabet to call my own.  So far I've only made capital letters from A to L, but, if you stay tuned, I'm sure there will be more to come.


Friday, April 20, 2012

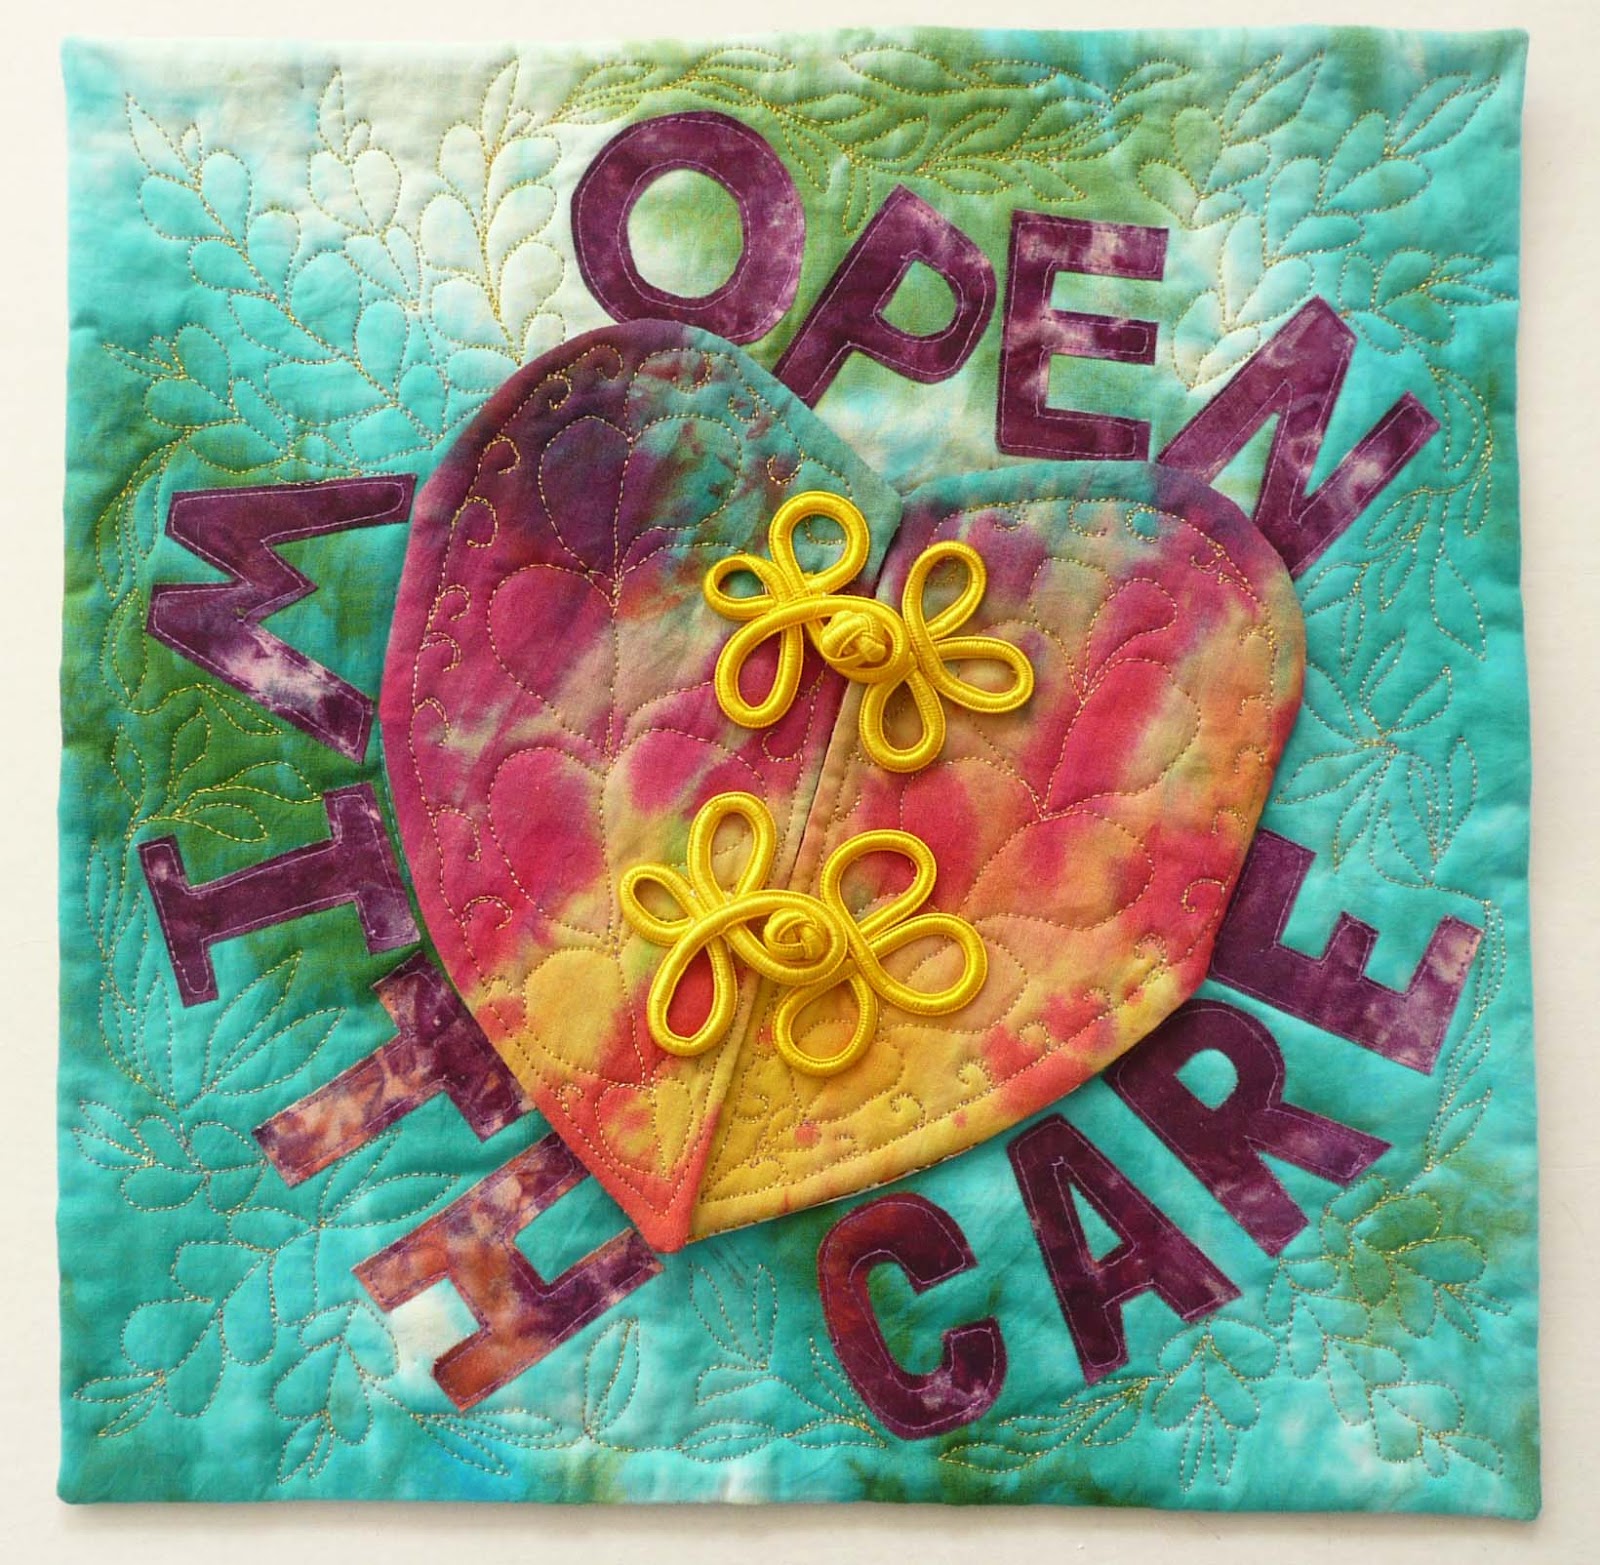
"Hearts All A Glow" - The making of an art quilt

I belong to a creative art quilt exchange group, Serendipity Art Quilts, whose April challenge was to create a 12" x 12" quilted work based on the theme "Hearts All A Glow".  What follows is a description of how I executed this challenge.
The Final Quilt

The Final Quilt with the Heart Opened
These are the steps involved in executing my idea of a heart opening to shine love.


Patterns
Two heart patterns were cut out of card stock.  The smaller one was used for the embossed aluminum element.  The larger one was used for the quilted heart halves that open to reveal the metallic heart.
Embossed Metallic Heart
The metallic heart was cut from the bottom of a disposable, aluminum baking pan.  The heart was then place on a mouse pad and embossed by drawing on it with a ball point pen that had no ink left in it.
Alcohol Ink Applied to Metallic Heart
The metallic heart was then "painted" with alcohol inks.
Hand Dyed Fabric
A 12 1/2" x 12 1/2" square was cut from hand dyed fabric.  This became the front background fabric upon which the heart would be placed.
Hand Dyed Fabric for Heart
More hand dyed fabrics were auditioned for use as the halves of the heart that would open.

Tracing the Pattern onto Fabric
The pattern was then outlined with chalk onto the fabric.

Batting Cut to Size
The pattern, without the tabs, was traced onto batting and cut to match the fabric heart elements.

Unfortunately, I did not take pictures of the stitching process for the heart halves, but it progressed, as follows:  The fabric and batting "sandwich" was stitched around the edge from the start of the tabs to the end of the tabs, leaving the tabs unstitched so that the sandwich could be turned right side out.  Once it was turned right side out, the heart halves were free motion quilted.
                                     
                                      Overall Background Quilting

I drew letters on card stock and cut them out as patterns for the words.  I then applied fusible webbing to the back of hand dyed fabric, used the letter patterns to cut the fabric, fused the words to the quilt sandwich and finally top stitched the words to the background.


The field upon which the heart would be placed consisted of a backing, batting and front fabric.  The batting was laid atop both the front and back fabrics and stitched with a 1/4" foot.  1/3 of the bottom was left open for turning and after being turned right side out, the bottom was closed by hand stitching.

The larger heart pattern was then traced with chalk onto the background and quilted.   After quilting the heart shape the entire background was quilted with an all over, modified feather design.  This quilting needed to be done before the heart halves were added so that there would not be a risk of bending the metallic heart.

The heart halves were then placed in an open position upon background with the tabs facing into the quilted heart shape on the background.  
Placement of Elements
Then the metallic heart was placed on top of the quilted heart shape to cover the tabs.  I used two very small pieces of double stick tape to hold the metallic heart in place so that it would not shift when I top stitched it to the background.  Once the metallic heart had been stitched down, the entire heart element was complete.
Frog Closures
Try as I might, I could not successfully execute knotting "frog" closures, so a quick visit to the fabric store solved that problem.  Once the frogs were stitched down, the front of the quilt was completed.
Process Recap
The final step involved sewing a hanging sleeve to the back and making a label.
When I emboss metal again, I will try to remember to take pictures of the process and post them.  Metal is fun to work with and can add a lot of "pop" to a piece.


Thursday, April 19, 2012

Create Surface Design with White Flour Paste

Last week Jane LaFazio posted a mini tutorial on making a resist with white flour on her blog, JaneVille,  Even though I was getting ready to hit the road for points north when I read the post, the method seemed so simple that I had to try it before I jumped into the car.

Here are the steps I took and will definitely take again...

Step #1:  Lay out a plastic bag on the work surface.  This is to protect your table or work counter.  Then place fabric on the plastic bag.  Do not wet the fabric.
Step #2:  Mix 1 cup water with 1 cup white flour.  Stir well to make a fairly lump free mixture.  Use only COLD water.  To make a larger batch of resist, just keep the ratio 1:1 flour and water.
Step #3:  Apply the flour and water resist mixture to the fabric.
Step #4:  Spread the flour and water resist mixture evenly over the fabric with almost anything with a straight edge.

 Step #5:  Inscribe a design into the flour and water resist.  
At first the design didn't hold, but after letting it set up for just a few minutes, the design seemed to remain clear.
Closeup
Step #6:  Now, this is the difficult part.  LEAVE THIS ALONE AND LET IT COMPLETELY DRY.
Since I was out of town for 5 days, this first attempt had become bone dry.  It was so dry that it buckled, but that was more than okay.  
Dried and buckled fabric with flour and water resist.
Step #7:  Push down on the buckled areas.  The resist with crack and that is what it is supposed to do.  Next, gently rumple the entire piece to produce overall cracking in the resist.
Step #8:  Apply thinned fabric paint over the entire piece.  
I didn't thin down the paints enough for them to penetrate well, so I sprayed the entire piece with plain water.
 
Step #9:  Here is another difficult part.  LET THE FABRIC PAINT COMPLETELY DRY.

Step #10:  After the paint is COMPLETELY DRY the piece may be soaked in water to release the flour and water resist or....

I did a preliminary scraping with a spatula to remove the majority of the resist before soaking the piece in water.  I'm on a septic tank sewer system and I didn't want to risk clogging the drains with the dissolved flour that might act like a sticky paste and possibly clog the system.
Step #11:  Soak the entire piece is warm water to remove residual flour and water resist.  The piece may now be washed in the washing machine and heat set in the dryer.  Or if all of the resist is removed by soaking, let the piece dry completely and then heat set with an iron.

The initial inscribed handwriting and leaf forms were not completely clear and that may have been because I put the resist on too thickly.  However, I really like the way it turned out.
Some closeup views 
AND ALL OF THIS IS WITH A GREAT BIG THANK YOU TO JANE LAFAZIO FOR POSTING HER TUTORIAL ON HOW TO MAKE THE WHITE FLOUR AND WATER RESIST.


Wednesday, April 11, 2012

Fiber Art Exhibition at Santa Monica Art Studios Hangar Gallery

It was thrilling to receive the announcement that my work, "Escape and Return" had been juried into a month long exhibition at the Santa Monica Art Studios Hangar Gallery.  The flyer I received only lists the artists and their works who were chosen from Quilts on the Wall submissions.  The gallery is huge and will also have a plethora of fiber art submitted by other outstanding artists.
Santa Monica Art Studios Hangar
Gallery Flyer
Opening Reception  Saturday, May 19, 2012 from 6-9 p.m.
3026 Airport Avenue, Santa Monica, CA  90405
Exhibits runs from May 19 - June 16, 2012
Regular Gallery Hours:  Wednesdays-Saturdays Noon - 6 pm
"Escape and Return"
Come one!  Come all!  It promises to be a great exhibit.
Hope to see you there.