Showing posts with label hand dyed fabrics. Show all posts

Saturday, April 29, 2017

"Waiting for Dawn"

It all started with a
one-of-a-kind print from many moons ago
Print Made from Raised Impression on a Small Serving Plate
and some hand dyed fabric remnants
After doing some dying, printing and piecing, I had come to a stopping place with a piece I was working on and started to clean up after making a mess.  Just couldn't bring myself to toss the dyed remnants.  I had 8small,  orange tone triangles and a several feet of left over strips of mottled grey fabric.  As I opened the draw were I save workable remnants, the print of a small bird caught my eye.  It had been hiding in that drawer for at least a couple of years.

I tried several arrangements of the remnants and finally settled on a design that I liked and set about piecing it.  On my worktable lay some green fabric that I thought might pull out the muted green in the print.  Yep.  It worked so I pieced a border with it, backed it with batting and fabric and set about doing simple stitch in the ditch quilting.

I could have bound or faced the piece, but since it was 12.5" x 12.5" and I had a 12" square stretched canvas on hand, I put a boxed facing around it and stapled the facing to the back of the canvas.
Stapling the Facing to the Back of the Frame
To finished the piece I cut a mat board backing, glued it to the back, attached small D-rings and strung the piece with hanging wire.  Waalaa!  Another brain fluff was complete.
"Waiting for Dawn"
 I dearly love the creative moments which come about with no planning, just the joy of making something from nothing.
Always remember, never fear to experiment.  
Sometimes wonderful things happen.
© Linda Friedman 2017.  All rights reserved

Wednesday, February 8, 2017

A Dear Friend Returns

This post is a review of how my wonderful friend and I worked together to actualize a dream of making a quilted duvet cover with fabrics that she and her husband, Ken had collected over the decades of their marriage.  Ken, a master of many talents, created the design for the quilt top that was to be.
Helmi and Ken Flick
Last year this extra special friend, Helmi Flick, flew in from Texas to start construction of the duvet cover.

A little history of our friendship may be warranted here.  Back in the late 1980s and 90s Helmi and I worked together at Childrens Hospital Los Angeles.  I worked in Neurology and she worked in Neuropathology.  Childrens Hospital was an affiliate of the USC School of Medicine from which I had just come.  She was the very first person to come to my office to welcome me with open arms and her inimitable laughter to offer any help that I might need in acclimating to the ways of Childrens Hospital.  That was the moment which sparked a life long friendship with this lovely lady who I consider a sister of the heart.
Meeting Helmi at Lindberg Field Airport.in 2016

Helmi and Me in 2016 when she visited


When Helmi and Ken visited a couple years before, they left a banker's box of their fabric collection with me.  When they departed, they promised that Helmi would be back to create a quilted duvet cover with the fabrics they had collected.

After they returned to Texas, Ken worked up a design for what they envisioned to be the duvet cover.  I venture to guess that their love of the ocean was inspiration for the design
Ken's Conceptual Schematic

A Few of the Wonderful Hand Dyed Cotton Fabrics
All the Fabrics Laid Out on the Work Table
Helmi envisioned the quilt being constructed from strip pieces of the fabrics so we got to work cutting strips.
The First Cut!!
Once the first cut was made we were off and running.
Stacks of Strips
We only had one week to get this done.  We needed to be able to work both together and separately.I had set up two work tables and two sewing machines so that we could work in a somewhat assembly line fashion. 
Helmi Sewing Strips Together
Each striped seam needed to be ironed open.
Ironing the First Strips
And the strips started coming together.
Linda Clipping Wayward Threads As the Top Started to Take Shape
The Top is Starting to Take on an Image of Water
The first section started to become a little wonky, so it needed to be blocked before we could continue with the next section.
Linda Blocking the First Section on a Design Board
The next section which represented the sun shining on water was roughly laid out.
Preliminary Layout of Fabrics to Represent Sun
Individual pieces were then sewn together end to end and then the long strips were sewn together..
The Top Starting to Come Together and Laid on on Work Table
To represent shimmers on the "water" we used a satin stitch that went from very narrow to wider to narrow again.
To have an idea of how many pieced strips were used, one only need look at the back.
Back of Strip Pieced Top
To preview our work, we laid the completed strip pieced top on my bed.
Previewing The Strip Piecing on My Bed
Because we did not have a work table wide enough to lay the top flat, we took to the floor.  We used a carpenter's plumb bob and rulers to square up the measurements according to the size that Ken had defined in his schematic drawing.

Using Plum Bob and Rullers on the Floor
Once that was complete, black borders were added.
Black Borders Added
Helmi and I became intimately familiar with the floor as we then laid out fabric to piece together for the  backing. 
Helmi Laying Out Backing Fabric and Batting and Taping to Floor
Once the backing was pieced together, batting and top were laid upon it.
Pieced Top Laid On Top of Batting and Backing Fabric
The top was then pinned to the batting and backing.
Linda Pinning Top to Batting and Backing
Once the pinning was complete, the quilt "sandwich" was lifted from the floor and taken to the sewing machine.
Lifting the Pinned Quilt Sandwich from the Floor
Finally, the quilting began.
Quilt "Sandwich" Rolled to Fit through the Throat of the Machine
Helmi put the pedal to the metal and quilted her little heart out, right up to the time that she needed to pack her suitcase for the trip home.

We did not finish the entire quilted duvet cover before the week came to an end when she needed to catch her plane back to Texas and to her loving husband, Ken, and their wonderful kitties.  We talked about how we could confer via Skype so that she could finish the quilted work at home in Texas..  Instead of moving forward via Skype, Helmi made plans to visit again this year to finish the quilt.

Next week Helmi will arrive, once again, at Lindberg Field in San Diego and we will spend the fikkiwubg (translate:-]  following) week working on attaching fabric for the drop to the floor, putting on a second backing which will accommodate the duvet and we should have finally completed this very fun project.  The icing on this cake will be spending time together with lots of hugs and wonderful laughter.  I am so blessed to have such a magnificent friend.
Always remember, never fear to experiment.  
Sometimes wonderful things happen.
© Linda Friedman 2017.  All rights reserved

Friday, January 13, 2017

"Tulips in the Window" - Stained Glass in Fiber

As the years pass, unfinished works seem to add up and then fade into that abyss of time.  My New Year's resolution for 2017 was to revisit storage trunks, pull out uncompleted works and finish at least the ones that I had begun years ago.

I began this work over 8 years ago.  It withstood the test of time--I still liked what it might become.  Today I am ecstatic to report that this piece is completed!  Yay!!

Here are a couple of close-ups of this work in which I used hand dyed and silver lamé fabrics on a background of black commercial fabric

Here are a couple of close-up shots:

Now, I must get back to going through my trunks to identify more works in want of attention.

Always remember, never fear to experiment.  
Sometimes wonderful things happen.
© Linda Friedman 2017.  All rights reserved

Wednesday, April 15, 2015

Deep Sea Ballet in Fiber - Scene 3


I'm ecstatic to report that I completed my 38"(w) x 42"(l) "Deep Sea Ballet" whole cloth, art quilt last evening.   I'm quite excited about it and am chomping at the bit to post a picture of the entire piece; however, as mentioned earlier, it may be exhibited in August, so I still must wait until the exhibit has opened.  Thus, only close ups of some elements will be posted here.

Henri Matisse's work, La Danse, was a constant inspiration as I created this work.  Perhaps you can see how Matisse's painting influenced the "Deep Sea Ballet" fiber art work.

In order to accentuate the suggestion of water movement I inserted piping between the top and the batting and stitched on either side of to create a raised effect an upward motion.
 I created upward "floating" sea flora by sewing together strips of hand dyed stretchy fabric.  After the strips were sewn together, I slashed the edges and then machine stitched the streamers to the top. The green ocean bottom image was made from a loosely woven scarf that I free motion stitched over the "base" of the sea flora and to the quilt top fabric.


To further suggest ocean flora, I hand cut a stencil from freezer paper and stenciled it with Setacolor opaque and transparent paints.


 Until August, this will probably be the last time I write about this work.  Once it is hung in the exhibit, I'll post a picture of the finished work.

Thank you for taking this deep sea journey with me.  It's been great fun.

Always remember, never fear to experiment.  
Sometimes wonderful things happen.
© Linda Friedman 2015.  All rights reserved

Sunday, July 13, 2014

Turn Fabric Scraps into Art


If I were a betting woman, I'd wager that anyone who creates anything with fabric has a scrap bag filled with remnants of fabrics that are just too great to toss.  This construction consists of some of those prized fabric pieces in my ever growing stash of scraps.

It started with a few pieces serendipitously appearing next to each other on my worktable--a scrap of drop cloth canvas, a few mottled fabrics.  Also on the table was a collection jar of buttons.  All these items were singing to me.  Even though I was knee deep into another project, I was drawn to "play" with them just for the pure fun of it.
This remains a thought in progress.  I've thought of using it as a starting point for a larger work but am now considering surrounding it with a black border and then mounting it on a colored fabric background, making a frame and then stretching it like an artist canvas around the frame.

Here is one idea that is percolating in the mysterious recesses of my mind.

Meanwhile, I need to get back to working on a piece that has a deadline which will come all too soon if I continue to play with this piece.

One last word...Don't forget to check out the Quilting Daily blog next Friday, July 18, 2014 to start the blog hop with artists from Quilting Arts TV, Series 1400

Always remember, never fear to experiment.  

Sometimes wonderful things happen.
 © Linda Friedman 2014.  All rights reserved.

Tuesday, October 29, 2013

From Remnants a Story Grows

A few months ago I "gifted" two large bags of fabric remnants to a local group and decided to try to emulate Eleanor Burns by tossing out small remnants but, try as I might, I just couldn't bring myself to throw beautiful snippets into the trash.  Oh, woe, within the year I had two more bags of remnants but this time, I rolled each leftover piece of fabric, tied it with string, and once again started to save these little treasures.  A couple of weeks ago I pulled out the bags, sorted the remnants, cut them into swatches with parallel sides and started stitching them to 6" blocks of cut newspaper.

Here is what is developing.

In the second row from the left, 2nd block down, I inserted netting instead of a block of strips and then stitched a mini quilt onto the netting...and here it is :-)

What is seen through the netting is the end of two storage shelves that sit behind the block so this picture does not adequately show the transparent quality of the netting.  When I make the quilting sandwich with batting and backing, 6" holes will be cut in those layers, also.  How I will finish the edges, I am not quite certain yet, but I'm sure that a refined finish can be accomplished.  Ah, the challenges.  They just keep coming and I relish them--well, most of the time I relish them.  At other times I pull my hair.

When I hung the piece to see how it was developing, I liked it but it lacked a story and I knew there was a one hidden in it that need to be told so...

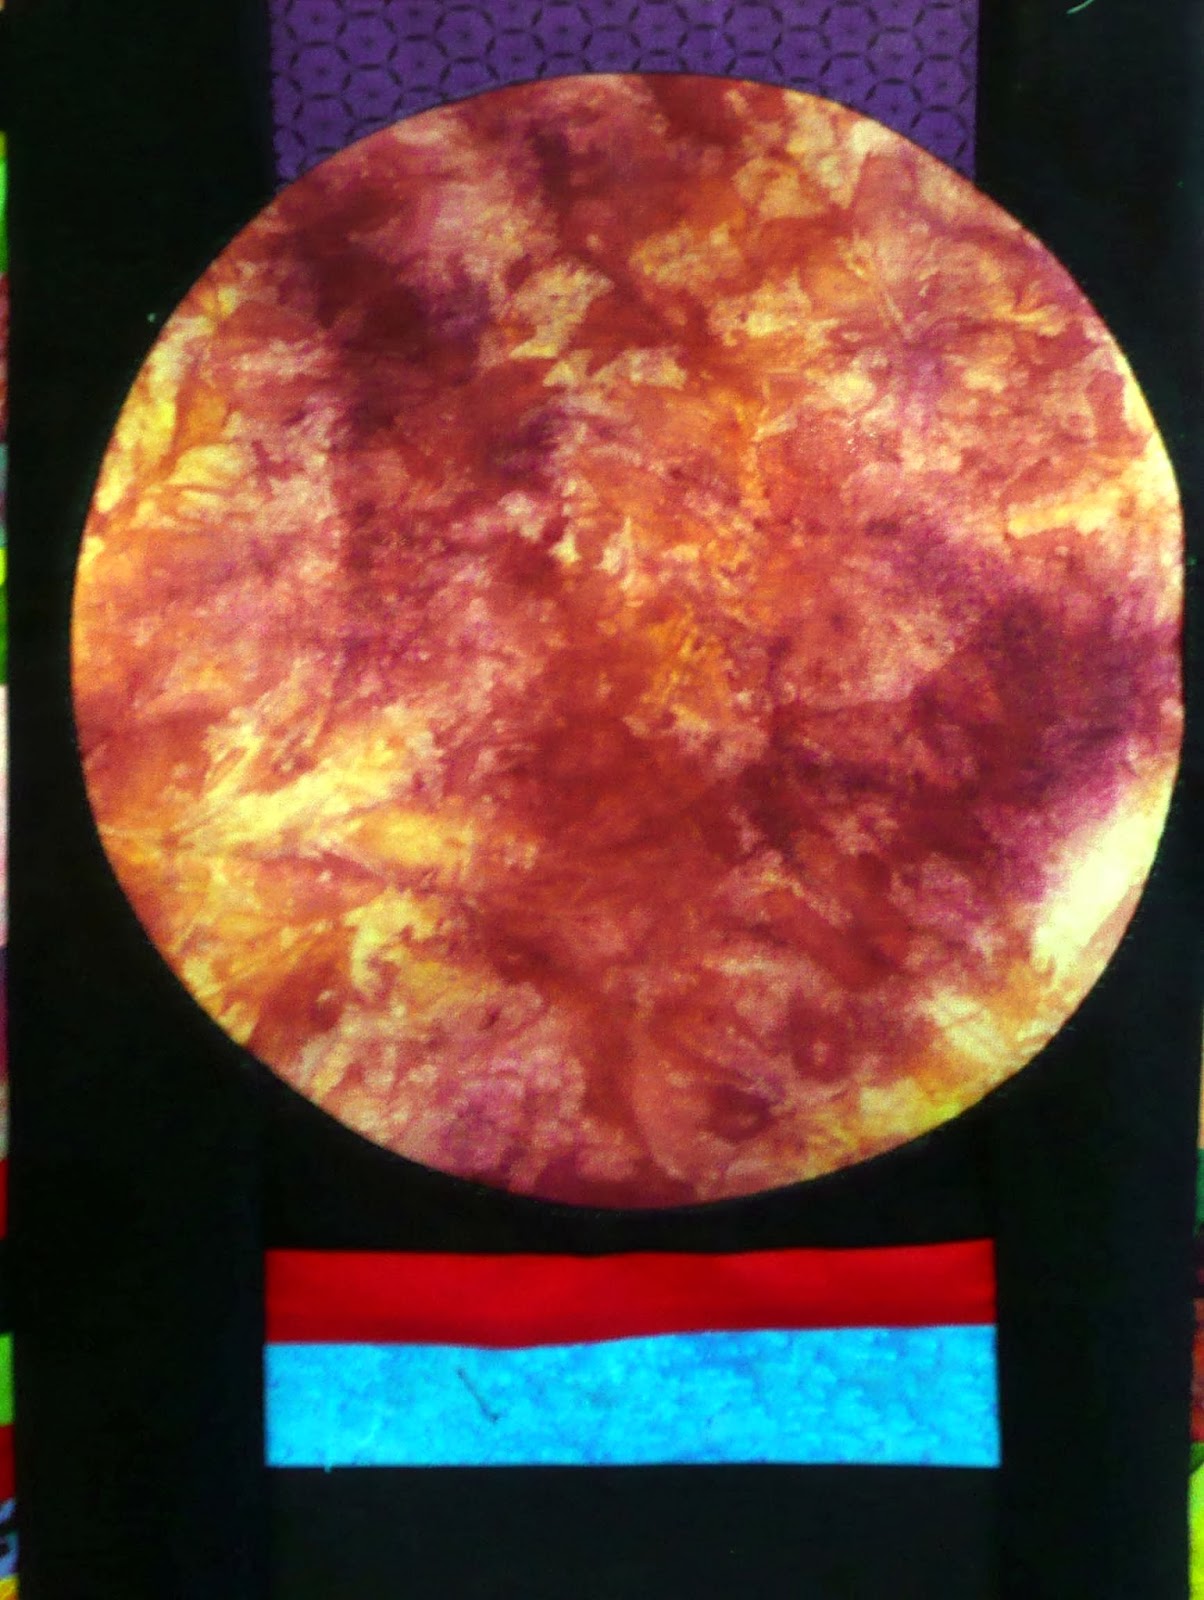
Out of my hand dyed fabric stash I selected a piece that might suggest a sunset sky, drafted a circle from brown craft paper to use as a pattern and then cut a circle from the hand dyed fabric.  I then fused it to Heat-n-Bond Fusible Iron On Non- Woven Stabilizer* to give it stability.  Next I cut a smaller circle from the quilt top so that it would overlap the edges of the hand dyed fabric circle and affixed the circle with satin stitching.  And now, dah-dah, here is that element...


The story is beginning to develop--at least in my story telling mind.  I plan on creating either an appliqued or a free motion embroidered element into the circle and linking it somehow into the mini-quilt that is set on netting, but that will be in the near future.  As it develops, I will add pictures, but at the moment I have three other projects on the work table that are crying for my attention.  Isn't that just the way it goes with artists--especially those who are also quilters?
________________
*  It might be worthwhile to note that the Heat-n-Bond Iron On Non-Woven Stabilizer is very soft and does not, even slightly, alter the hand of the fabric.
________________


All contents of this blog are Copyright © 2007-2013 Linda Friedman / Linda's Art Quilts  All rights reserved.

Monday, September 5, 2011

Tea Bags, Checkerboards and Birds - The Final

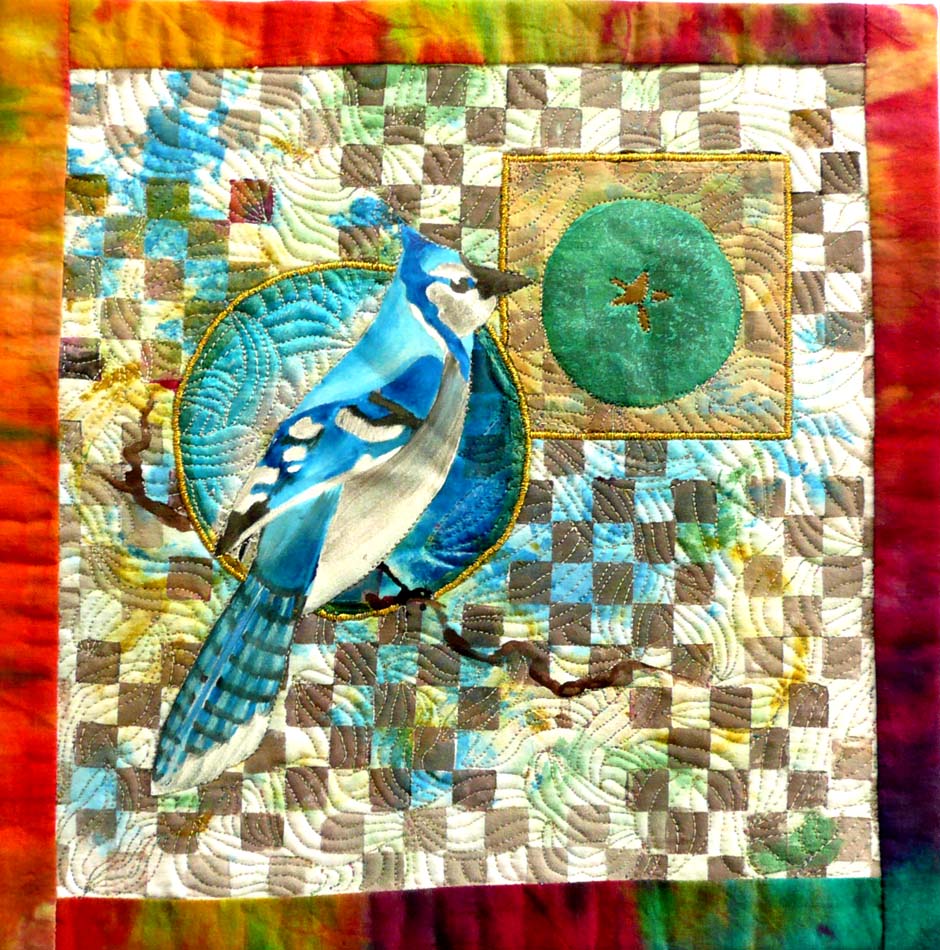
The blue jay is finally finished.  Because the bird became somewhat lost on the busy background of squares, I drafted a circle around it and then filled it in with Jacquard luminescent textile paints to provide a contrast that would make the bird stand out.  Satin stitching around both the circle and the tea bag was done to provide a unified focal image.  The borders and reverse are made from a hand dyed fabric.  Since there was only a little of the hand dyed fabric left after the borders and backing were done, the hanging sleeve needed to be pieced.

Now, it's on to working on a piece with some writing on it...

Finished Tea Bags, Checkerboards and Birds

Close-up of Bird and Circle
 
 Reverse

Label

Reverse - Close-up of Quilting

Sleeve

Close-up of Stitching around the Jay