Showing posts with label Sewing. Show all posts

Monday, April 10, 2017

From Drapery to Scarf - How To


A while back I had to shorten microfiber drapes that left me with several, 74" x 20" lengths of fabric that I could not bear to throw away.  They sat dormant in my fabric stash for several months until I recently had a brainstorm on how they might be used.

A Microfiber Remnant from Shortened Drapery

The softness of the fabric was a tactile delight that I thought might feel wonderful wrapped around the neck in a scarf.

After cutting two 7" strips from the microfiber fabric, I soaked the fabric in water and then wadded up each 7" wide length and wrapped a few rubber bands around each clump of fabric.

In a microwave safe Ziploc container I then mixed up a batch of a Rit Dye product made for synthetics* in hot water, submerged the fabrics into the dye mix and lightly laid the lid onto the container.

Rit Dye for Synthetics
I then placed it into the microwave oven and heated it on high for about 3 minutes and then let it soak for a while.  After washing out the dye, the original beige microfiber became a lovely, mottled orange.

Of course, enough never seems to be enough when playing with fabric and color, so I resurrected a stamp that I had made a long time ago.
Original Leaf Stamp
Because I did not want both fabrics stamped with the same color, I picked orange and dark blue Setacolor fabric paints to use as the stamp colors.  I let the fabric dry to the damp stage and then poured the paints on an old, plastic meat tray.

It was time to print the leaf shapes onto the fabric.
Setacolor Fabric Paints and Old Meat Tray
Fabric with Orange Stamped Image
Fabric with Blue Stamped Image
Throughout the entire process, the fabric did not fray but I chose to line at least the orange stamped fabric with a pleasing color satin that I found in my stash of fabrics.

Satin Fabrics
 I merely laid the stamped fabric face-to-face on a 7" satin strip, stitched around 3 sides, turn it right side out and hand stitched it closed.

This is almost like a vestment stole that clergy wear.  It lays flat as it cascades down the chest.  I have another color satin ready to line the blue stamped fabric, but I'm not sure if I am going to line this one.  Without lining, it will drape loosely and lend itself to a variety of scarf configurations.

* I purchased the Rit Dye from Michaels; however, is available from some fabric stores and on a variety of on-line sites. 
To me, brainstorms are the spice of life.
Always remember, never fear to experiment.  
Sometimes wonderful things happen.
© Linda Friedman 2017.  All rights reserved

Monday, November 14, 2016

Great Tool Discovery for Sewing Machine Plate


My son-in-law showed me this little screwdriver a few days ago as he was installing a motion detector light.  I thought, "Wow, I could use that on my sewing machines' plates."  Even though machines usually come with a short screwdriver to help remove the plate, I invariably burn my knuckles on the sewing machine light bulb.  This little tool is just what the doctor ordered. 

Harbor Freight carries this tool for a mere $2.99   Here is a picture of it in Harbor Freight's catalogue.
If you happen to buy one of these little gems, you may be joyously surprised.  It comes with 5 different sized heads.
Always remember, never fear to experiment.  
Sometimes wonderful things happen.
© Linda Friedman 2016.  All rights reserved

Friday, January 21, 2011

Pocket Book for Fiber Arts Post Cards

I belong to Serendipity Play Group, a mini group of Quilts on the Wall in Southern California.  The focus of the group is on creating and exchanging 5" x 7" quilted, fiber arts post cards.  A recent project is for each member to create his or her own "pocket book" for the post cards that are exchanged.  Because my grandmother called her purse a pocket book, that image has always been among my fondest memories; thus, my take on the pocket book was the shape of a purse.

My Completed Pocket Book

Yarn Fringe Looped Through Binder Rings

Side View that Shows the Edges of Various Pages

How and Where to Insert the Post Card

Three Sets of Buttonholes were Made to Accommodate the Binder rings
(inside view)

Three Sets of Buttonholes were Made to Accommodate the Binder Rings
(Outside view)
 
Page Example with Clear Vinyl Stitched around Three Sides
and Yarn Stitched around Four Sides

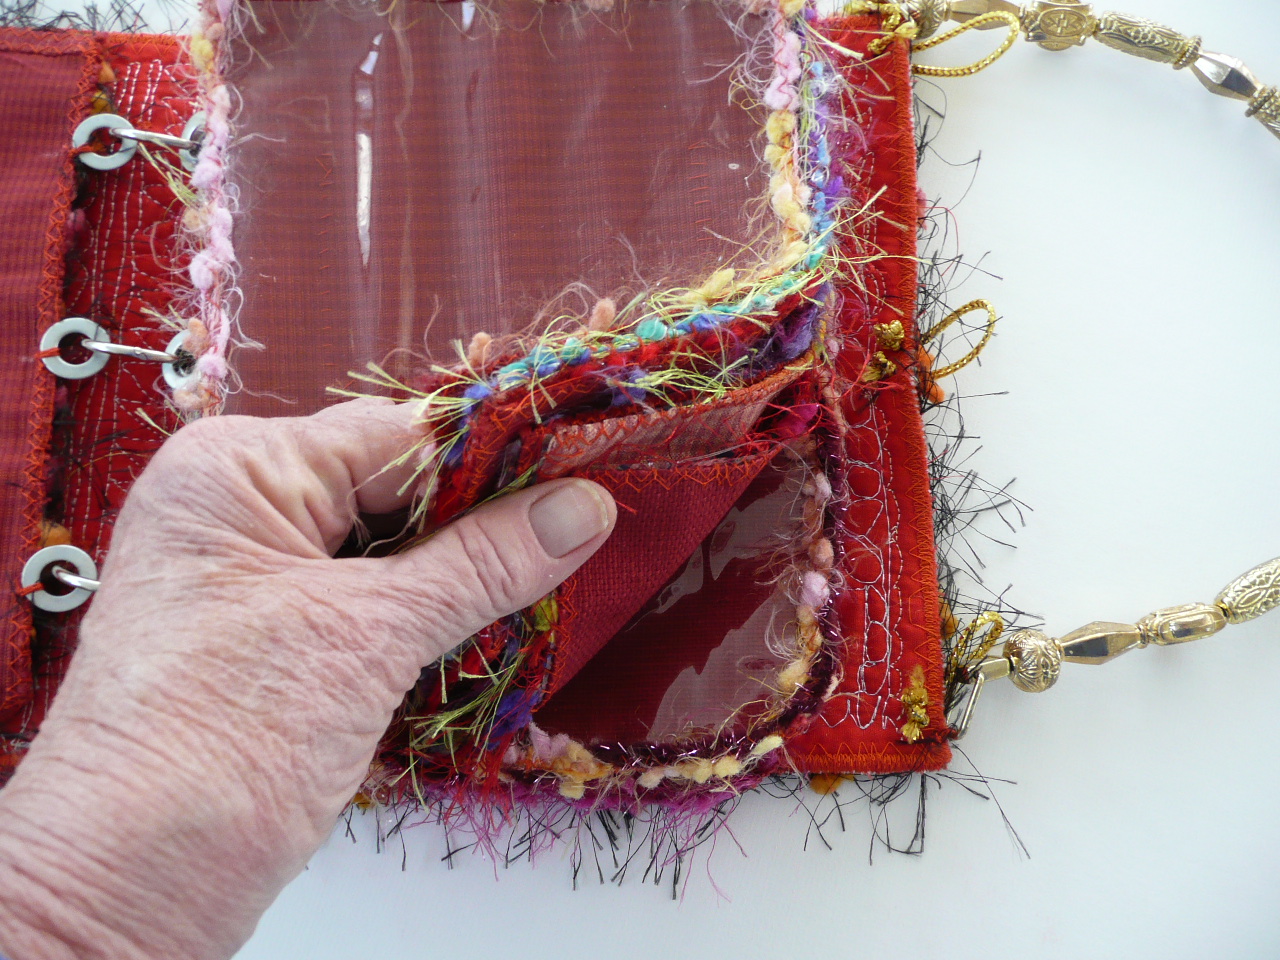
Example of Page Back
with Handsewn Vinyl Pocket to Hold Card Documentation

Washers Sewn to Each Page

Another View of Washer Attachment

A Handle Was Sewn to the Back Side Edge of the Pocket Book and
Heart Shaped Buttons were Stitched to the Front Edge.
The Clousure Consists of Loops of Cording That Were Stitched to the Back Edge
and Looped Over the Heart Buttons

View of Various Pages

Open Pocket Book

Final View of Completed Pocket book