 |
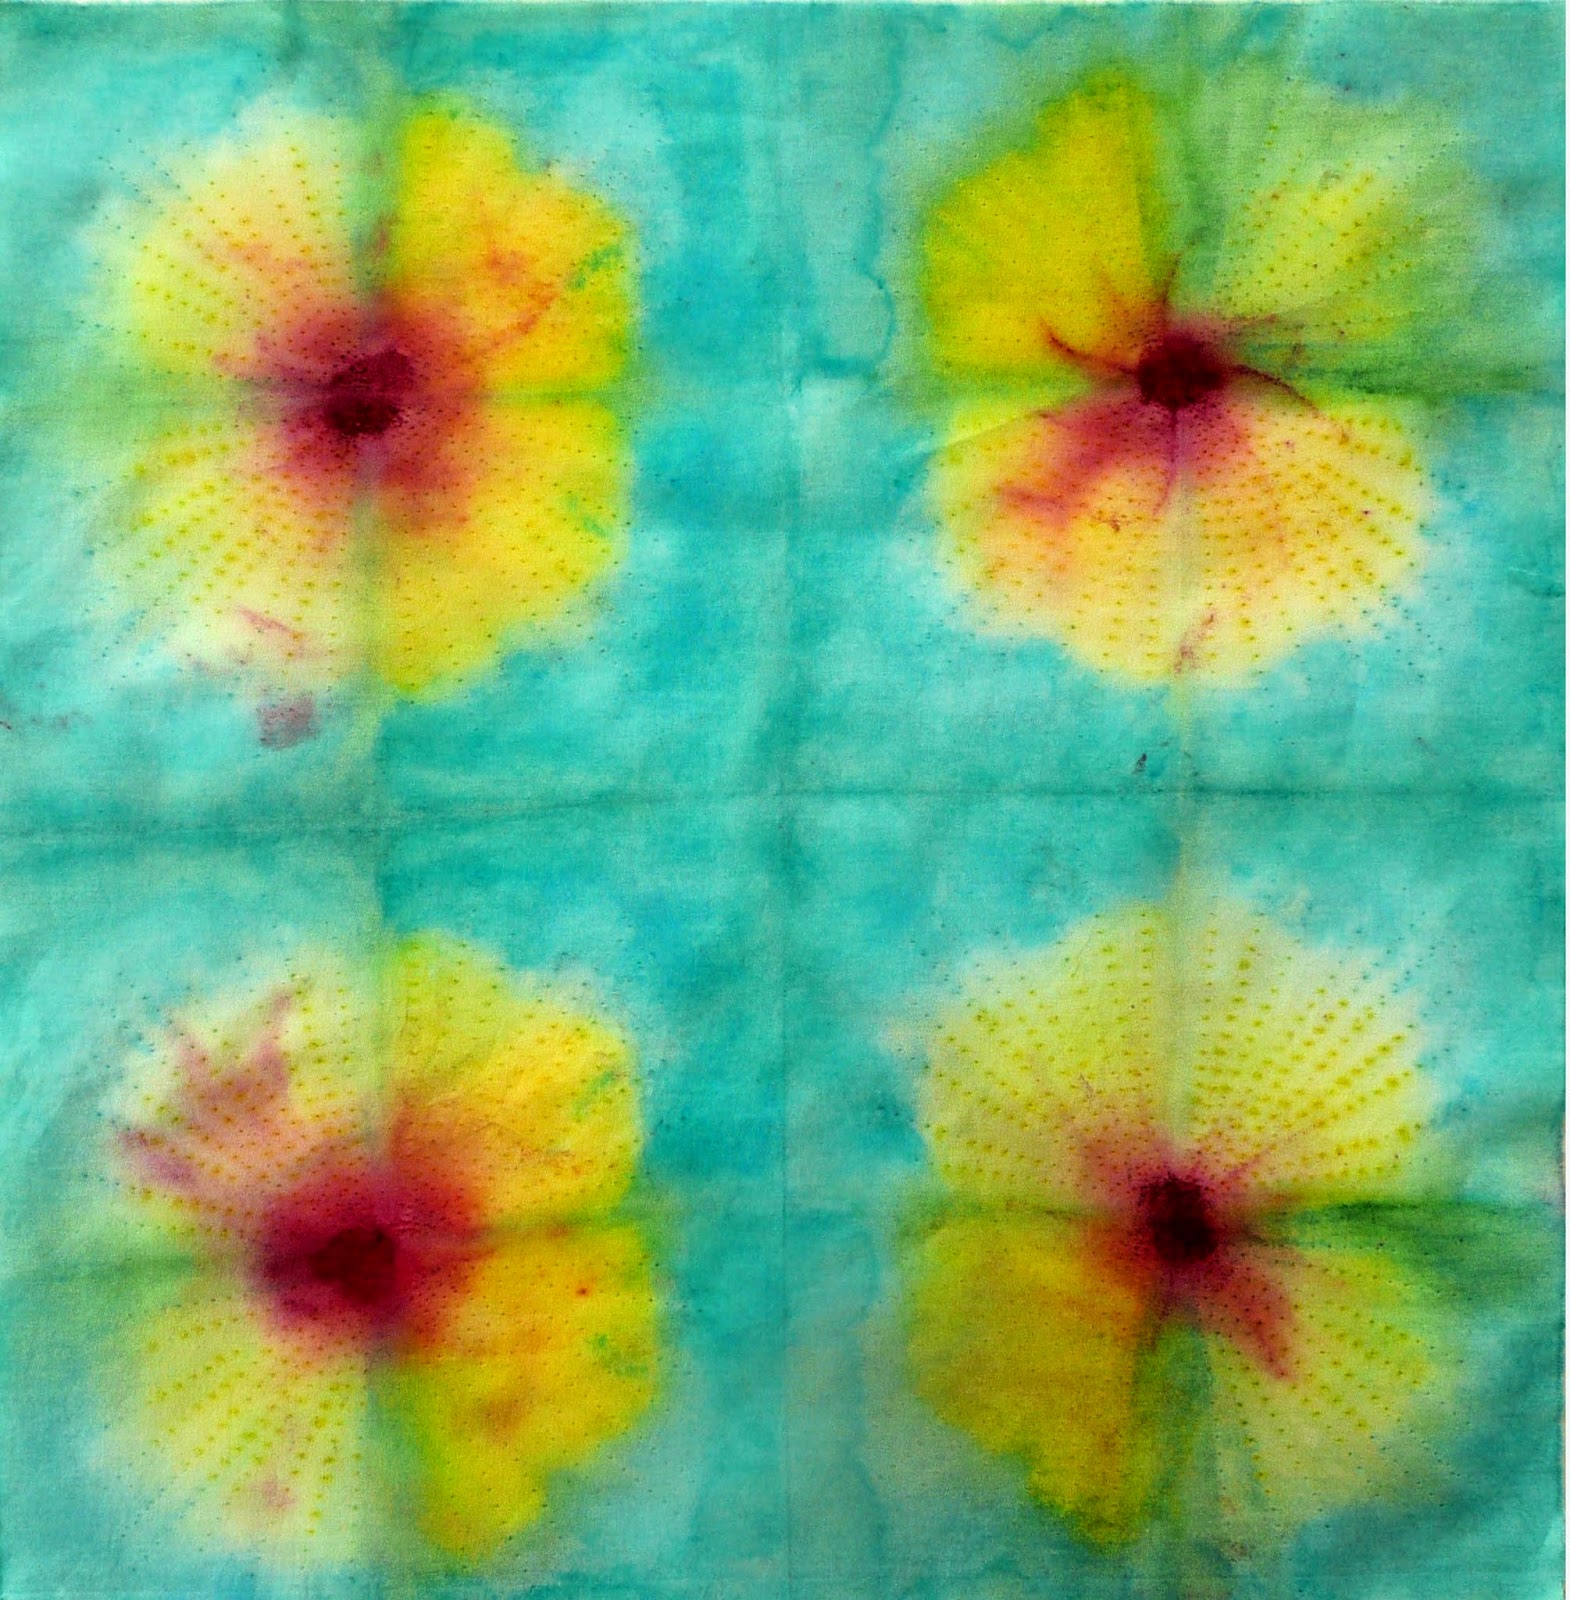
| Finished, quilted project |
 |
| Fabric folded 4 times and stitched in radiating pattern |
Materials: 2 plastic bins - one for hot water and one for cold water
1 microwave safe bin with lid
1 pair rubber (or other) protective gloves
3 small containers to hold dye and 1 small container to hold hot water
Microwave safe measuring cup (optional)
2 inexpensive, plastic lab pipettes or 3 paint brushes
Microwave safe plastic wrap
1 spray bottle with clear water.
Paper towels or sacrificial fabric for clean-up
Sewing machine (hand stitching optional)
Notions: thread, seam ripper
 |
| Table set-up |
5. Soak folded, stitched fabric in bin of hot water.
6. Put on protective gloves
7. Add approximately 3 Tbs. of 3 Rit Concentrated Liquid Dye colors to 3 separate small containers.
8. Add 3 drops of very hot water to dye in each small container.
 |
| These are different colors, but the process is the same as describe herein |
9. Use lab pipette or paint brush to apply dye to fabric. Apply lightest color first. Allow edges of colors to meet. I did not take a picture of this step, but I played with an image in a photo editing program to illustrate this step.


11. Place dyed fabric into microwave safe container with lid. Place the lid on top of the container but do not secure it firmly. Steam will need space to escape.
12. Heat the fabric for 35 seconds on a high setting.
13. Remove fabric from microwave and let cool to the touch.
14. Rinse fabric in bin with cold water. Squeeze out excess water.
14. Use seam ripper to remove stitching.
15. Lay out 2 overlapping lengths of microwaveable plastic wrap in lengths that are longer and wider than the dyed fabric.
 |
| Overlapped lengths of microwaveable plastic wrap |
17. Use paint brush or pipette to drop 3rd color into center of each circular shape.
 |
| Third color added to fabric |
19. Lay two more overlapping sheets of microwaveable plastic wrap on top of fabric.
20. Fold over all edges to make an envelope.
 |
| Plastic wrap envelope |
 |
| Envelope folded in half |
 |
| Final fold to prep for further setting in microwave |
 |
| Packet in microwave |
25. After 35 seconds in the microwave the packet will puff up. This is because of
steam that is created within the sealed plastic wrap packet.
 |
| Packet puffed after being heated in microwave. |
27. Let packet cool for 1 minute and then tear the packet open.
 |
| Packet torn open to reveal dyed fabric |
29. Squeeze out excess water
30. Lay out or hang fabric to dry.
31. Iron finished dyed fabric.
 |
| Finished dyed fabric |
 |
| Front view of dyed and quilted fabric |
 |
| Back side of quilted, dyed fabric |
And always remember, never fear to experiment.
Sometimes wonderful things happen.

© Linda Friedman 2014. All rights reserved.
Great technique - love the finished effect!
ReplyDeleteI'm glad you enjoyed this Shibori technique that used Rit dye, Anonymous. Thank you for taking the time to drop a note...Linda
DeleteWow you made it look so easy...I love the colors!!!
ReplyDeleteFrom the artist who creates beautiful work with magical ease, this comment means a lot, Shana!
DeleteLooks very fun. I am going to try your method and the rit dyes out. Mary Beth Kile
ReplyDeleteMary Beth, I forgot to choose "Reply" but I did leave a reply to your thoughtful comment.
DeleteMary Beth, you create beautiful fiber reactive dye work that for you to even be interested in a water soluble technique makes me happy. It works just dandy for me because it takes such little space and is so very quick to do. What took time for this project was the quilting :-)
ReplyDelete