 |
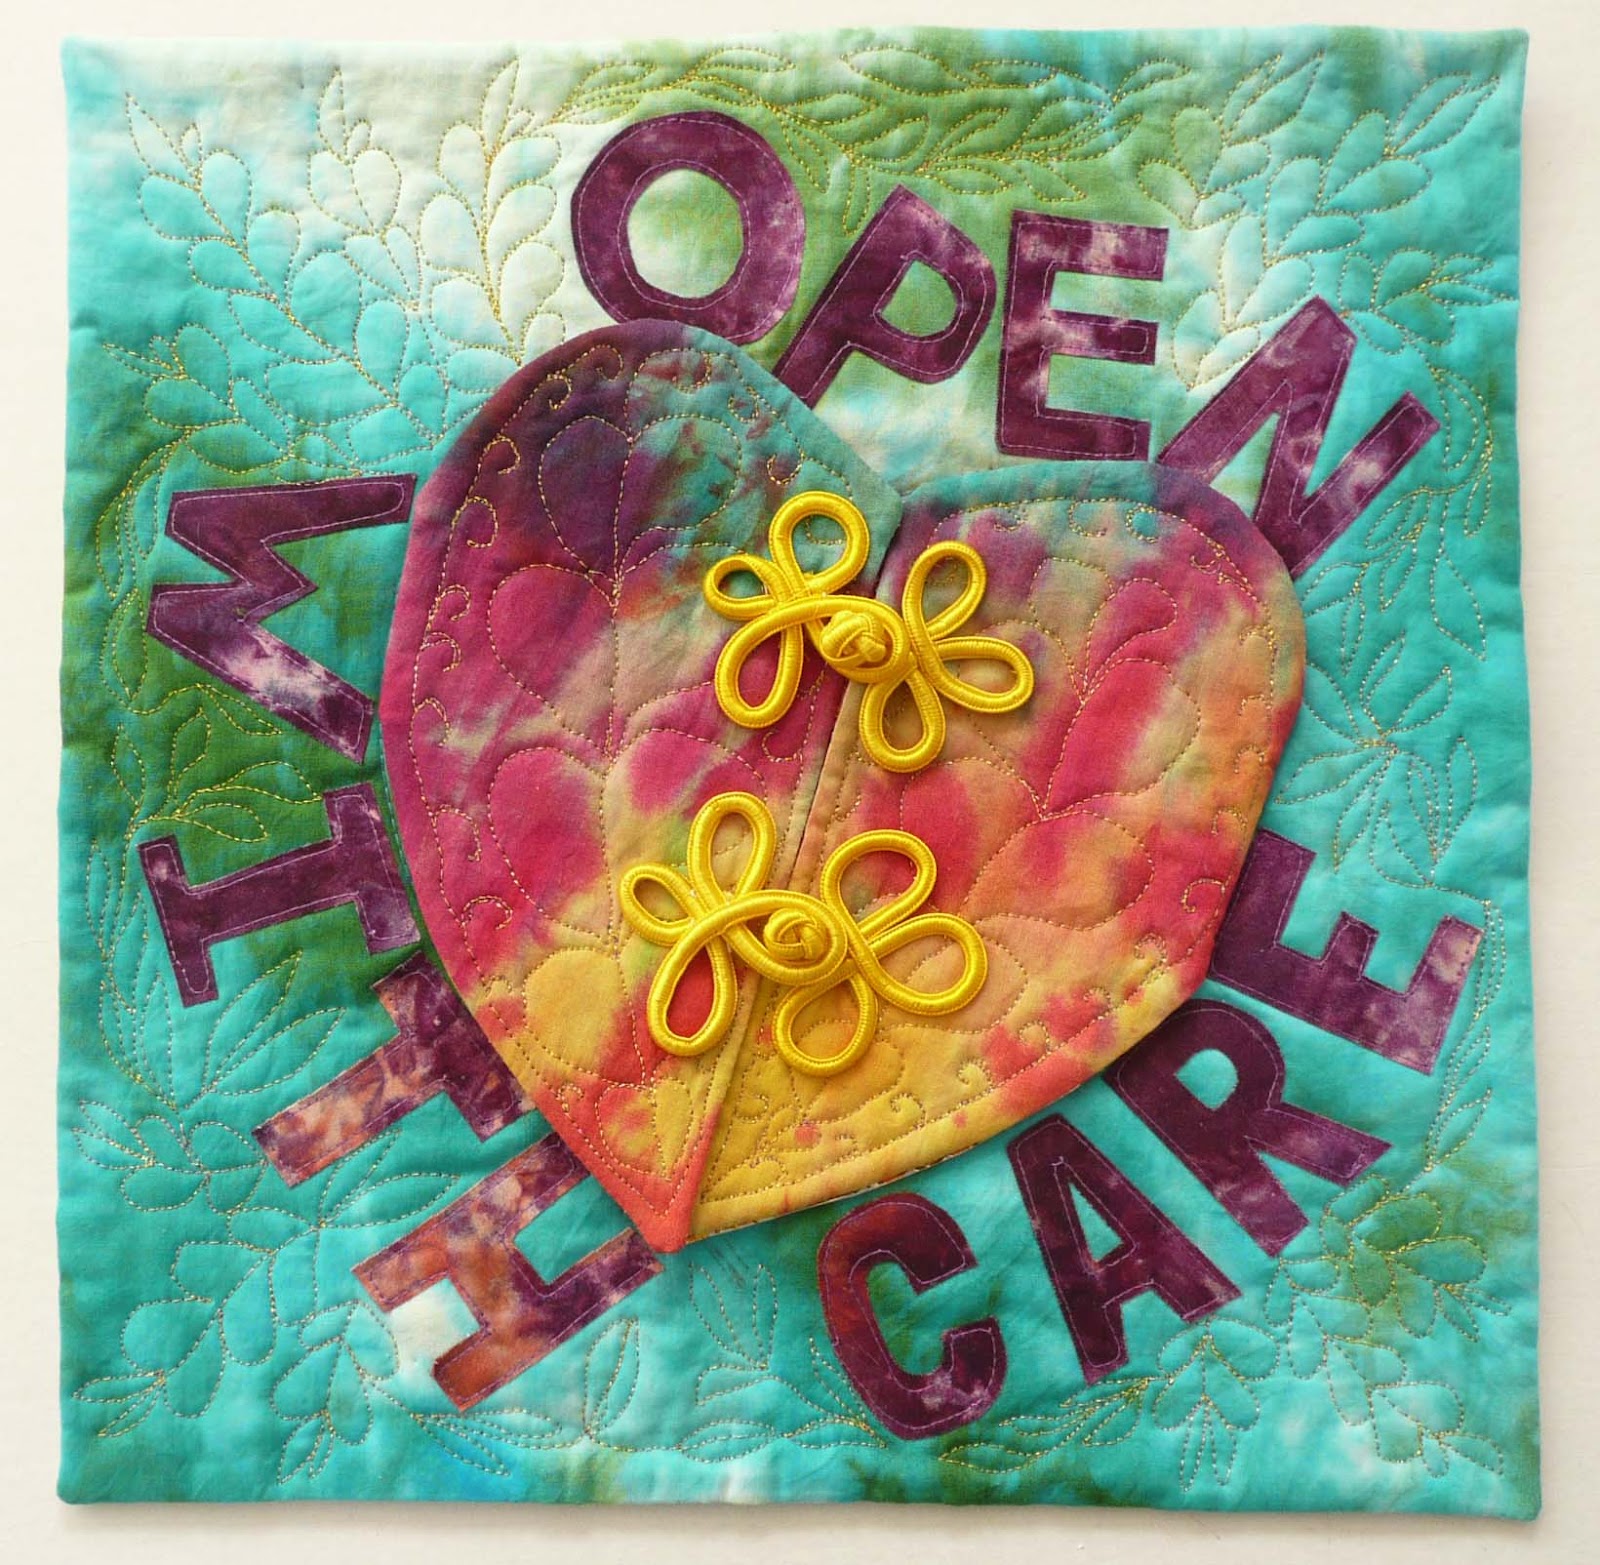
| The Final Quilt |
.jpg) |
| The Final Quilt with the Heart Opened |


 |
| Patterns |
Two heart patterns were cut out of card stock. The smaller one was used for the embossed aluminum element. The larger one was used for the quilted heart halves that open to reveal the metallic heart.
 |
| Embossed Metallic Heart |
The metallic heart was cut from the bottom of a disposable, aluminum baking pan. The heart was then place on a mouse pad and embossed by drawing on it with a ball point pen that had no ink left in it.
 |
| Alcohol Ink Applied to Metallic Heart |
The metallic heart was then "painted" with alcohol inks.
 |
| Hand Dyed Fabric |
A 12 1/2" x 12 1/2" square was cut from hand dyed fabric. This became the front background fabric upon which the heart would be placed.
 |
| Hand Dyed Fabric for Heart |
More hand dyed fabrics were auditioned for use as the halves of the heart that would open.
 |
| Tracing the Pattern onto Fabric |
The pattern was then outlined with chalk onto the fabric.
 |
| Batting Cut to Size |
The pattern, without the tabs, was traced onto batting and cut to match the fabric heart elements.
Unfortunately, I did not take pictures of the stitching process for the heart halves, but it progressed, as follows: The fabric and batting "sandwich" was stitched around the edge from the start of the tabs to the end of the tabs, leaving the tabs unstitched so that the sandwich could be turned right side out. Once it was turned right side out, the heart halves were free motion quilted.
 |
| Overall Background Quilting |
I drew letters on card stock and cut them out as patterns for the words. I then applied fusible webbing to the back of hand dyed fabric, used the letter patterns to cut the fabric, fused the words to the quilt sandwich and finally top stitched the words to the background.

The field upon which the heart would be placed consisted of a backing, batting and front fabric. The batting was laid atop both the front and back fabrics and stitched with a 1/4" foot. 1/3 of the bottom was left open for turning and after being turned right side out, the bottom was closed by hand stitching.
The larger heart pattern was then traced with chalk onto the background and quilted. After quilting the heart shape the entire background was quilted with an all over, modified feather design. This quilting needed to be done before the heart halves were added so that there would not be a risk of bending the metallic heart.
The heart halves were then placed in an open position upon background with the tabs facing into the quilted heart shape on the background.
 |
| Placement of Elements |
Then the metallic heart was placed on top of the quilted heart shape to cover the tabs. I used two very small pieces of double stick tape to hold the metallic heart in place so that it would not shift when I top stitched it to the background. Once the metallic heart had been stitched down, the entire heart element was complete.
 |
| Frog Closures |
 |
| Process Recap |
.jpg)


I love this!! So creative, inspired, colorful, beautifully executed and educational. I am so impressed with you! Linda, you enrich my life.
ReplyDeleteAnd you have always enriched my life, Helmi. Just yesterday I led a person to your blog posting in which Ken and you both gave some insights on things to consider when in the market for buying a camera. My friend is as awestruck with your blog as I am. Did I tell you that some months ago I found the perfect frame for your poster. It now stands proudly on an easel in my studio. Love you!
DeleteThis post is so well-written and the photos are clear and detailed. I've said it before and it's worth saying again..........you should submit an article to either Quilting Arts and/or ClothPaperScissors.
ReplyDeleteOh, one more thing. Did you see Judy's post today. It's on her metal class. Today must be "Heavy Metal Friday"!
Mia, I'm glad you liked the "Hearts All A Glow" posting. That was a very fun challenge.
DeleteYes, I did see Judy's post about her metal class. It was her work that first inspired me to explore various uses of metal in my work. "Heavy Metal Friday", that's too funny :-)
Love Love Love it! Just received your "Hearts All A Glow" Thanks so much Linda! Its awesome...Teresa
ReplyDeleteAhhh, I'm glad you like it, Teresa. This was a great challenge, wasn't it?! I had a lot of fun moments dreaming this up and then trying to execute it.
DeleteI love this piece, and appreciate the description of your methods. It is wonderful!
ReplyDeleteEileen, I just saw your comment. I'm glad that you like the piece and very much appreciate your leaving such a supportive comment.
DeleteI love how you incorporated both traditional and modern techniques in this quilt.
ReplyDelete