Showing posts with label Weldbond. Show all posts

Monday, November 30, 2015

Block Printing with Craft Foam #1

As I was putting things away in the studio after my day of playtime thread sketching, my hand fell upon some sticky back craft foam.  Instead of continuing to straighten up, I started cutting circles and strips from the foam.

From this seemingly mindless activity emerged four 6" x 9" printing blocks which are being used to create a 40" x 40" themed challenge.  I won't be able to show the completed work until it has gone through a jurying process, hopefully making the cut, and finally being exhibited.  However, here is the beginning of this particular block making technique.

Tools Used for Cutting Sticky Backed Foam
Foam, Ruller, Compass, Craft Knife

Use Compass to Mark Circles and Cut with Scissors
(Block #1)
Circles Ready for Mounting to a Board
Note:  The school of experience has taught me that one layer of the forms is not high enough.  When drawing a paint roller across one layer, or even two layers, often paint will get onto the mounting block and print onto the fabric.  This is definitely not something one wants. So I always make three layers of foam shapes.  See profile below.
 
Three Lays of Foam Shapes

Block #2
Three Layers of Thick Stripes
Block #3
Three Layers of Thin Stripes
(Ultimately I needed a fourth block, but that will be addressed later in this series of blog posts about creating printing blocks with craft foam.)

In order to make somewhat permanent, rigid blocks to make printing easy, I cut 3 6" x 9" plywood blocks onto which I affixed the foam shapes.  I attached he first layer of each foam shape to the plywood with Weldbond glue so that the block would withstand multiple washings without coming loose.  The sticky substance on the back of the foam works well for affixing the foam layers together but it is not strong enough to permanently stay on a wood block.
Plywood Block
 Tomorrow I'll show how I used these blocks to audition the colors to use when printing.
Always remember, never fear to experiment.  
Sometimes wonderful things happen.
© Linda Friedman 2015.  All rights reserved


Tuesday, November 5, 2013

A Heart Emerges in November

It happened again!  I was trying, really I was, to clean my worktable of small remnants but a nice little white remnant jumped up and grabbed my attention.  I just had to do something with it other than toss it in the trash.  A fun Valentine greeting card emerged.
It all started with a heart and an arrow drawn on the fabric with Pentel Fabric Fun Pastel Dye Sticks blocks of color and words of love hand written around the heart with a #03 Alvin TechLiner technical drawing marker.  These drawing tools can be purchased at many art supply stores but, if memory serves me correctly, I believe I bought I bought my 4-pack through Amazon.

To stabilize the fabric I placed Timtex interfacing behind it and then secured it in a round, machine embroidery hoop and stitched around the heart in red and the arrow in black.

 Once the stitching was complete I cut the fabric to an even 1/4" away from the Timtex, glued the edges with Weldbond, a non-toxic white glue that will bond almost anything but still cleans up with water.

As the glued edges were drying, I cut a piece of red craft felt on which to mount the stitched heart fabric and cut it just shy of the 5"x6/5" blank greeting card stock that is in my paper stash.  At first I mounted the felt onto the front of the card with Weldbond since it was at hand.  WRONG.  The moisture in the glue distorted the card stock terribly so I discarded that attempt and turned to 3M Super 77 Spray Adhesive and it worked like a charm.


http://multimedia.3m.com/mws/mediawebserver?mwsId=SSSSSuH8gc7nZxtUOY_xPxm9evuSeChshvTSevTSeSSSSSS--&boundedSize=310

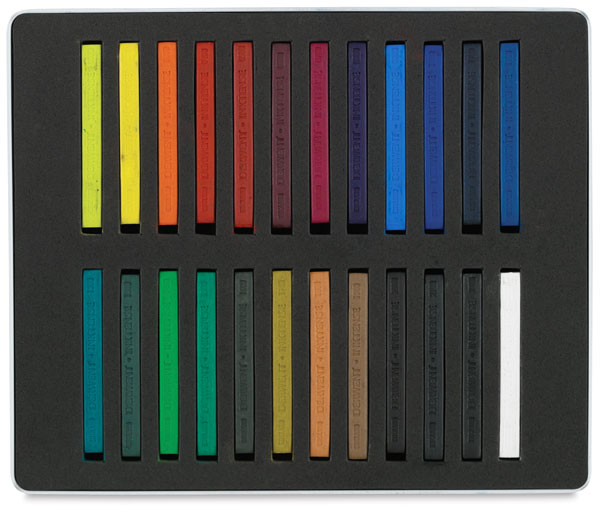
Last touches included using a red Inktense Watercolor block to make a border for the heart.  
                                                         Inktense Blocks, Set of 24
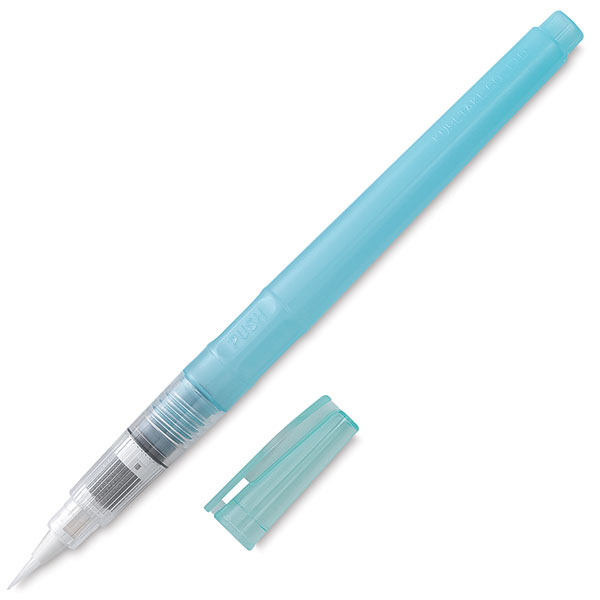
To soften the edges of the border, I painted over the red line with only water in a Niji Waterbrush.
                                                             http://cdn.dickblick.com/items/051/33/05133-1000-1-3ww-l.jpg
Finally, I sprayed the back with the same 3M Super 77 Spray Adhesive that I used to adhere the felt  and the card was finished.  When February rolls around, I'll post it in my ETSY shop along with some other cards that I've made to celebrate Valentine love.  I might even consider posting it now.  Fortunately, there is no edict that love can only be expressed on February 14th each year.
All contents of this blog © 2007-2013 Linda Friedman / Linda's Art Quilts  All rights reserved.