Showing posts with label dimensional fiber art. Show all posts

Saturday, April 29, 2017

Center Gallery, Anaheim, CA - Expressions in Fiber Art Reception

I belong to Beyond the Edge Fiber Artists, a great group of creative fiber artists in Southern California.  Our works range from art quilts, large and small, to dimensional fiber art will be featured from May 1 through June 19, 2017,  at the Center Gallery in Anaheim, CA.  If you happen to be in the Anaheim area during that time period, I hope you will stop by to visit the gallery.

Here is a special invitation to the artists' reception for you.
There will be food, drinks, presentations and a chance to meet the artists.
 

 Here are a few pictures of what one of my studio worktables looks like as I gather the items that will travel to the show. in Anaheim.


Hope to see you at the reception.
Always remember, never fear to experiment.  
Sometimes wonderful things happen.
© Linda Friedman 2017.  All rights reserved
 

Monday, May 23, 2016

From Angelina Fibers to Dimensional Art


For some time I have had a wrought iron piece that almost looks like an upside down lamp shade frame with elongated leaf shapes ribs.  Every time I looked at the wrought iron piece I wondered if I might somehow be able to use it as a form to shape a fiber art work.

After all too much ruminating over whether I could create something with the form, these are the steps I took to make this work happen:

1)  I brought the form in from the outside and made a pattern from one of the leaf shape ribs.  There were six leaf shapes on the iron piece.

2)  I then pulled out a roll of water soluble stabilizer and traced around the pattern six times onto a length of the stabilizer.

3)   Next I dug into my stash if fibers, pulled out some Angelina fibers and ironed some of the fibers to make what could almost be described as fabric.

4)   I then turned over the stabilizer and laid the ironed pieces of Angelina fiber over the outline of the leaf shapes.

5)  Another layer of stabilizer was laid over the first stabilizer layer and the layer of Angelina fiber fragments to make what would become a quilted sandwich.

6)  After the layers were pinned together, I set about stitching each leaf with gold metallic thread and a free motion foot.

7)  I then satin stitched around each leaf shape.

8)  Once all leaf shapes were completed I cut around each leaf shape.

9)  Next I sandwiched more Angelina fibers between more water soluble stabilizer and created a round, flower shape that would become the bottom where all the leafs would meet.

NEXT CAME THE REALLY FUN PART!

10)  I laid out a piece of parchment paper on the worktable to protect it.

11)  Next I turned the wrought iron shape upside down and wrapped it  in plastic wrap to also protect it.

12)  I then submerged the individual stitched pieces in warm water to BEGIN the process of removing the stabilizer.  NOTE:  I only dissolved the stabilizer enough to be able to see the Angelina fibers and the stitching.

13)  Because I left much of the element that makes the stabilizer soluble, the forms became exceptionally sticky and that was just what I wanted.

14)  I then laid the leaf shapes over the plastic wrapped wrought iron form and placed the now sticky flower shape over the end.

15)  To keep the shapes from slipping off of the plastic wrapped form, I inserted daisy headed pins through the leaf shapes and through the plastic wrap.

16)  The most difficult part was waiting for the piece to dry.

17)  Once the piece was dry it had become stiff but still bendable.  To further stiffen the pieces I painted them with Stiffy Fabric Stiffener and then let that dry.

18)  After the unit was completely dry, I used a large needle with metallic thread to stitch along a section of each leaf shape rib to create something akin to a vase shape.

19)  Finally, I rolled the tip of each leaf shape, lightly squeezed the roll, and then let each roll unfurl.

WaaLaa... Success!!

This is a process that I definitely wish I had taken pictures of along each step.

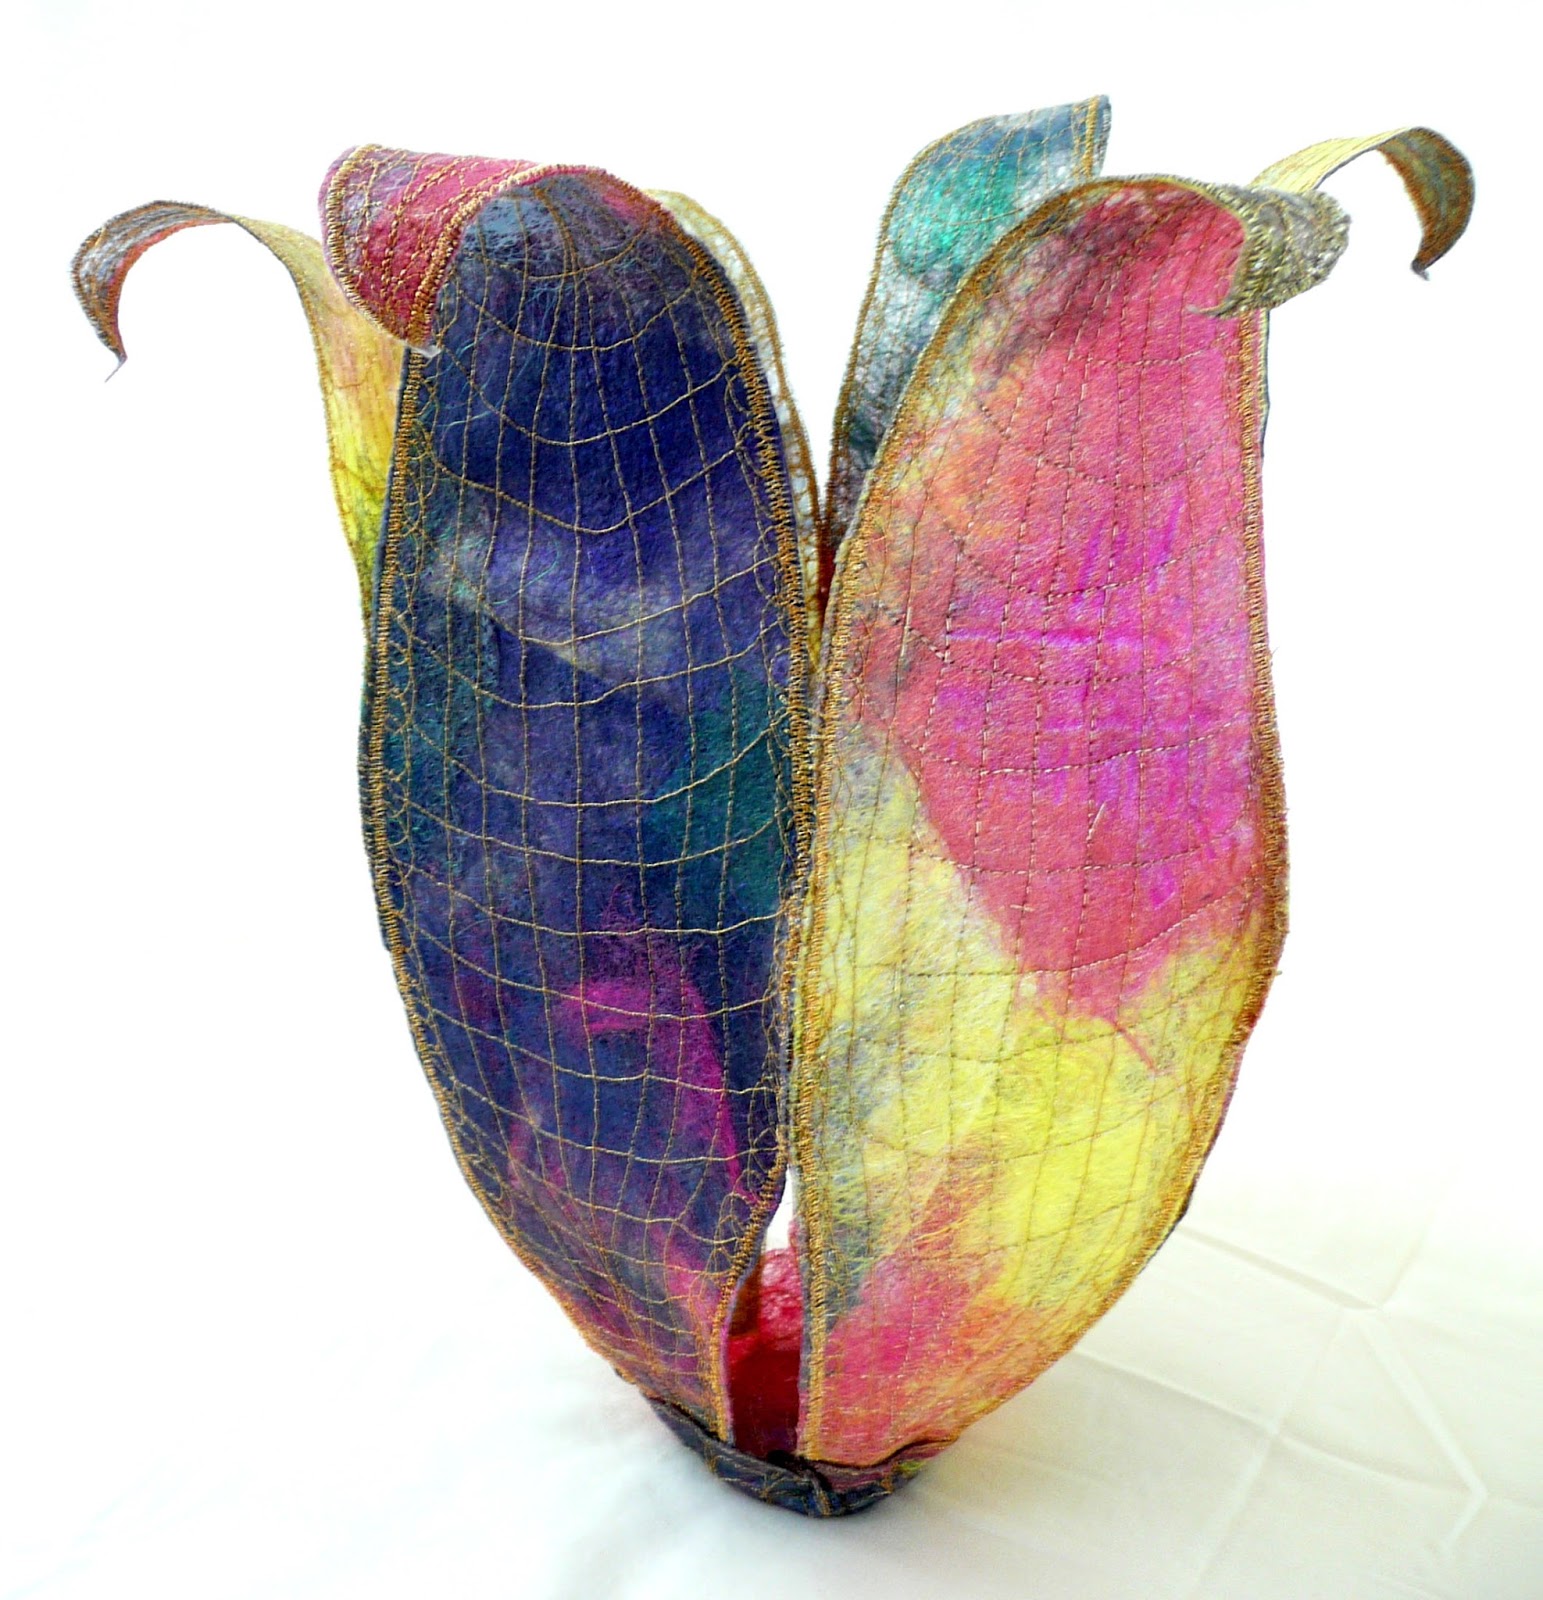
Here are a few other views of the completed work.
Another Frontal View

View Looking into the Form
Always remember, never fear to experiment.  
Sometimes wonderful things happen.
© Linda Friedman 2016.  All rights reserved

Saturday, February 20, 2016

Shaped by Fiber II

It has been a great honor to have several of my dimensional fiber art works on exhibit with the Beyond the Edge Fiber Artists at the Mission Viejo Library in Southern California for the month of February, 2016.   My excitement overflowed when I saw that three of my included works were shown first in a tremendous video that Laura and Luke Bisagna created. 

To view the video click on this LINK.

If you happen to be in the Orange County area, you might want to stop in at the Mission Viejo Library at 100 Civic Center, Mission Viejo, CA 92691.  The exhibit will be shown until February 2016.
Always remember, never fear to experiment.  
Sometimes wonderful things happen.
© Linda Friedman 2016.  All rights reserved

Sunday, January 24, 2016

3-D Transformation of Felt with Wire

I have long been fascinated with the seeming random quality of how leaves curl as they dry on the limb and then fall to the ground in an artful manner.  What follows is an experiment in trying to capture the feeling that I have when seeing dried leaves on the ground in the Fall.  Nature will always trump my efforts but that doesn't stop me trying.  Perhaps the following will act as a tutorial for you to make your own 3-D fiber art forms.

1.  Tools:     - 20 lb. picture hanging wire
                    - straight pins
                    - wire clipper
                    - beading foot
                    - free motion foot
 2.  Pin wire to felt.
 Note:  A pattern is not necessary.  Instead, merely started pinning the wire to the felt in wavy       lines that are meant to suggest the undulant lines of many leaf shapes.
Starting to Pin Felt to Fabric
3.  Set zigzag stitch width and length on sewing machine to 3.5 zigzag width and 1.5 length.  If you try this, you may need to set the machine width to a different number.  Just make sure that it will be wide enough to let the needle pierce the felt on either side of the wire. You don't want to dull your needle by it splitting the woven wire.

4.  Stitch wire to felt using beading foot.
Close-up of wire stitched onto felt.
How one completed leaf side and center stem evolved
5.  Pin wire to second side of middle stem and stitch, as described in #4.
6.  Sandwich a second length of felt over the wire stitched felt with the wire in the middle of the two pieces.
Layering Felt
7.  Pin the two layers together.  Insert pins so they capture the wire under them.  Use stitching line from the top layer as a guide.
8.  Stitch the layers together.
9.  After stitching around the entire leaf form, change from the beading foot to a free motion foot and reset your machine's stitch length and width to zero.
10.  Free motion quilt the leaf form in whatever pattern you choose.
11.  After completing a free-motion quilting design, use a stiff paint brush to paint the veins of the leaf form with green acrylic paint.
12.  After completely painting the leaf veins on both sides of the form, blend orange and brown      Setacolor fabric paints (or even acrylic paints, if desired) around the edges and into areas of green paint.
13.  Once the paint dries, cut around the edges of the form to "release" the leaf.
14.  Here is my resulting flat, elongated leaf form.
15.  Below are three of many ways the form can be manipulated.  Because it has a picture hanging wire skeleton the form can be flattened and reconfigured over and over again and each time it will hold its form.


Always remember, never fear to experiment.  
Sometimes wonderful things happen.
© Linda Friedman 2016.  All rights reserved

Monday, September 29, 2014

Quilts in Mancuso Quilt Fest, Palm Springs, CA


It was great fun this morning to receive a flier from the Mancuso Quilt Fest and to find that two of my quilts will be in the show.  They will be in the Special Exhibits section.  "Autumn's Palette"will be with the "Appearances" exhibit from Quilts on the Wall.   "Between Heaven and Earth" is in the "Fiber Perceptions" exhibit with Beyond the Edge Fiber Artists.
"Between Heaven and Earth"
"Autumn's Palette"
 If you happen to be in the Southern California area between October 2nd and October 4th, be sure to take in Quiltfest.  It's sure to be a great show.
Always remember, never fear to experiment.  
Sometimes wonderful things happen.
 © Linda Friedman 2014.  All rights reserved.